

3 ways to combine images and icons
3 ways to combine images and icons
The tutorials are back (as are the interesting links and visual essay)

I decided to bring back an old segment to the newsletter: tutorials.
I put it on hold for a while as I was trying a different approach to the newsletter (and honestly it takes the most work). Because it takes a lot of work, I don’t know if I’ll keep it up and I’m considering making it a paywalled feature (to force me to keep doing it!)
I’d love to hear your feedback.
Interesting links
A sketchnote of supporting neurodivergent learners in EFL by Emily Bryson. It’s so great to see educational institutions do a better job of supporting more learners. (You can watch the video here.)
Want to become a better listener? Check out Jatin’s sketchnote summary of a talk from Harvard Business Review.

Want to get into Urban sketching? Or maybe you already practice and want to go deeper. Well, Mike Hendley of
has put together a starter pack of his best podcast episodes with Urban sketches. (There are some other packs there too!)Take a peek inside the notebooks of some substackers with this post on
byI get to

We all have tasks we don’t want to do but need to do them.
But just because we are required to do them, doesn't mean we have to think that way. Instead of saying "I have to" think "I get to" or "I choose to". Each one can be true, it's just your perspective that shifts.
And shifting your perspective can have some massive benefits.
Suddenly, we realise that we are doing the thing we always wanted to. Or while this is difficult, it’s building towards something meaningful. But most importantly, we take ownership of our actions.
Because really, there’s nothing we absolutely have to do.
Sure, there can be negative consequences if we don’t, but we’re choosing to do this action instead of dealing with those consequences.
Taking ownership in that way helps us focus and motivates us.
So, next time you have to do your taxes (just me?), communicate with a tricky client, or make a logo bigger, choose to do it.
[This was an insight from Ali Abdaal’s book Feel Good Productivity]
3 ways to combine text and visuals in one
One of my favourite tricks in sketchnoting is illustrating a word.
Here are a few examples from an inktober challenge.
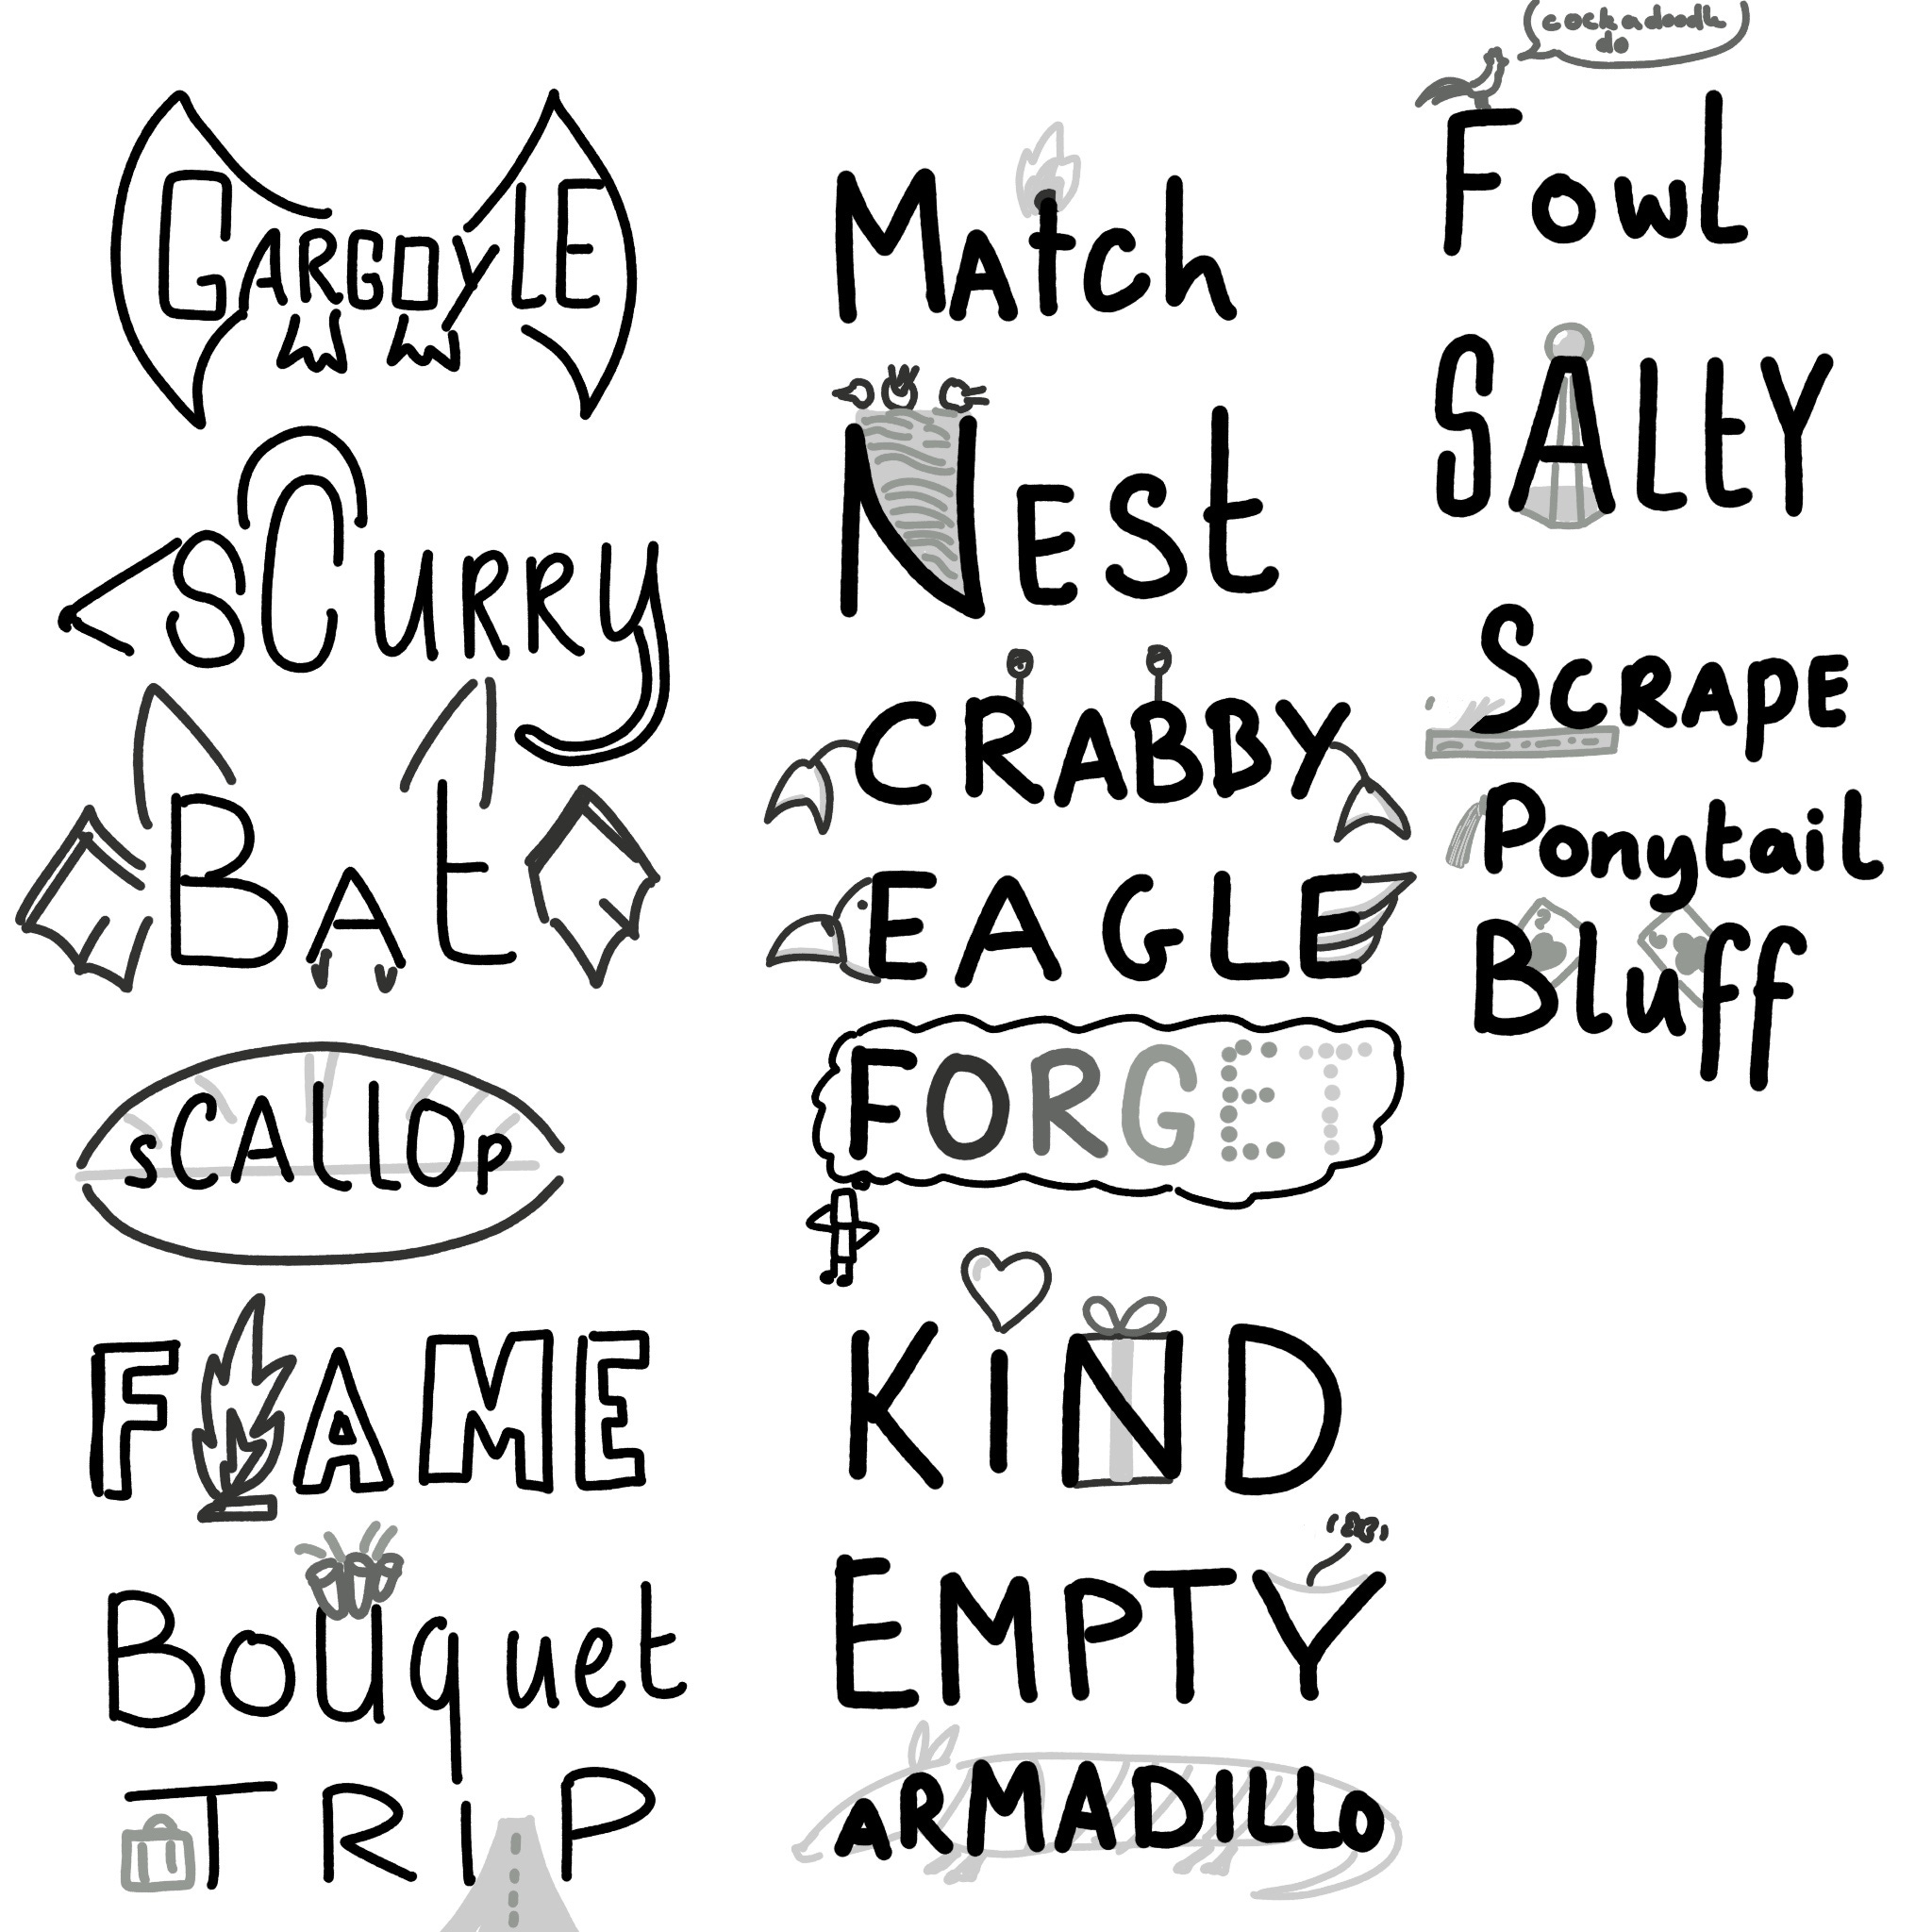
Today, I’m going to show you three approaches that you can use to achieve this effect.
Turn a letter into an icon
Sometimes, one of the letters can be turned into a word.
This is easiest for nouns of real objects and I’ve found that A, O, U, and T are the easiest as they have the most space around them to play with. The first and last letters can stand out well, but letters in the middle work well too.

Turn multiple letters into the icon
Alternatively, you can make ALL the letters into the idea.

Again, easy for nouns of real objects, but it can work beyond that.
Bonus tip: as a digital sketcher, you can put a layer behind the word to help show the shape it should have. If you use paper, you can sketch around or start with a light grey drawing, then write on top.

Make the word show the effects of the idea
Almost identical to the last one, but instead of looking like the idea, now we show the effects on the word.
Easy examples are large writing for words like HUGE or writing the word small in tiny font. But there are more options too. This is great for more abstract ideas as well as verbs, adjectives, and adverbs. But there’s more to this idea.

If there’s an association behind a word, you can show that too. A couple of examples
You can write the key item of a talk in large words to show its importance.
You can draw speed lines next to a word to show how quickly it occurs
You could show a bad project dragging down the business.
I find this kind of idea a lot harder to think of in the spur of the moment but they’re my favourite things in sketchnotes I make and see.
My final tip — especially for this last group — sometimes you can go back and add details around the word to cause this effect.
This is great when live sketchnoting when someone is going on with examples you know you can’t include so you can add a few extra details here and there. (or you can do it after the talk is finished).
What do you think about the return of the tutorials?
Admittedly this is more of a set of examples than strict tutorials so if you’d like more step-by-step then let me know in the comments below.
Thanks for dropping by and see you next week.
P.S. Here’s your chance to pledge with a special 20% off for life.